

How to create an own style?
Basics
In figure 1 shows the typical directory structure of a style. The index.html, style.css and script.js are required, additional files are optional and are illustrated by images and a font.

In figure 2 the interaction between the index.html, style.css and script.js is shown. The basic structure is defined in the index.html, which provides id- and class-attributes for the HTML elements. The id-attributes are used to identify an element via script.js or style.css. The class-attribute is used to assign the same properties to several elements.

A very good source as introduction to the topics HTML, CSS and JavaScript can be found at w3schools:
The Template

In figure 3 the index.html of the template is shown. In the header section should the title and all necessary references be set. The important references are the style.css, script.js, ajax.js and utils.js. In the style.css the design and positioning of the HTML elements are defined by the user and the script.js describes the functions that manipulate HTML elements. The ajax.js handles the communication with the server component and provides the data that can be directly used in the script.js by the user. The utils.js contains functions that are needed in most of the styles, e.g. a function which brings seconds (64.543) in a more readable form (1:04.453).
In the body section is only the invisible back button obtained, which gives the user the opportunity to go back to the style selection. The back button should be included in all styles to provide a consistent user interface in the (mobile) web application.

In figure 4 the style.css of the template is shown, which includes only the positioning and size of the back button at the beginning and will be complemented by the user with further definitions.

In figure 5 the script.js of the template is shown. In the beginning only the required functions updateType1, updateType2 and updateType3 are included, these functions will be called automatically depending on the JSON type if new data arrive in the ajax.js. The difference between the functions is as follows:
- updateType1(json): This function is called about 8 times per second and provides the data (JSON Type 1), which must be available in real-time (e.g. gear, rpm, speed, etc.).
- updateType2(json): This function is called approcimately 1 time per second and includes actions that should be performed for near real-time data from JSON Type 2 (e.g. tire temperature, personal best, current sector, etc.).
- updateType3(json): This function is called normally once per session (practice, qualifying, race) and includes actions which should be performed in relation to the "static" data (JSON Type 3) (e.g. max RPM, fuel capacity, etc.).
If updateType2(json) is called the updateType1(json) will be called after it automatically. If the updateType3(json) is called it is the same to updateType2(json) and updateType1(json). An overview of the available data can be found in the compatibility matrix.
Tutorial
The dashboard, which is to be created must fulfill the following requirements:
- permanent visual indication of the rpm incl. shift indicator
- permanent displaying the gear and speed incl. unit (km/h or mph)
- Button to switch between LCD modes
- LCD-Mode 1: Lap, Position, Fuel
- LCD-Mode 2: best lap time, last lap time, difference
- Button to enable / disable virtual display light


First, the template directory should be copied into the styles directory and renamed into Tutorial. Then should the Tutorial resources be downloaded and unpacked into the Tutorial directory.
The following files should now be available in the Tutorial directory:
- background.png
- button_grey.png
- button_red.png
- digital-7.ttf
- index.html
- logo.png
- script.js
- style.css


In the index.html a div element for the display is created which contains two tables, as shown in figure 9 and 10. The tables correspond to the LCD modes and the second table is hidden through the class-attribute hidden. Now follows the addition of a div for the button and the label for the backlight, one for the logo and a div for the button and label of the LCD mode. All the cells and HTML elements, which should be manipulated later via JavaScript, receive an id-attribute. The elements that should later use the same CSS properties should be extended with the class attribute. The two img elements, which will be served as buttons, should be extended with the onclick-attribute to call a function if the image is clicked or tapped.

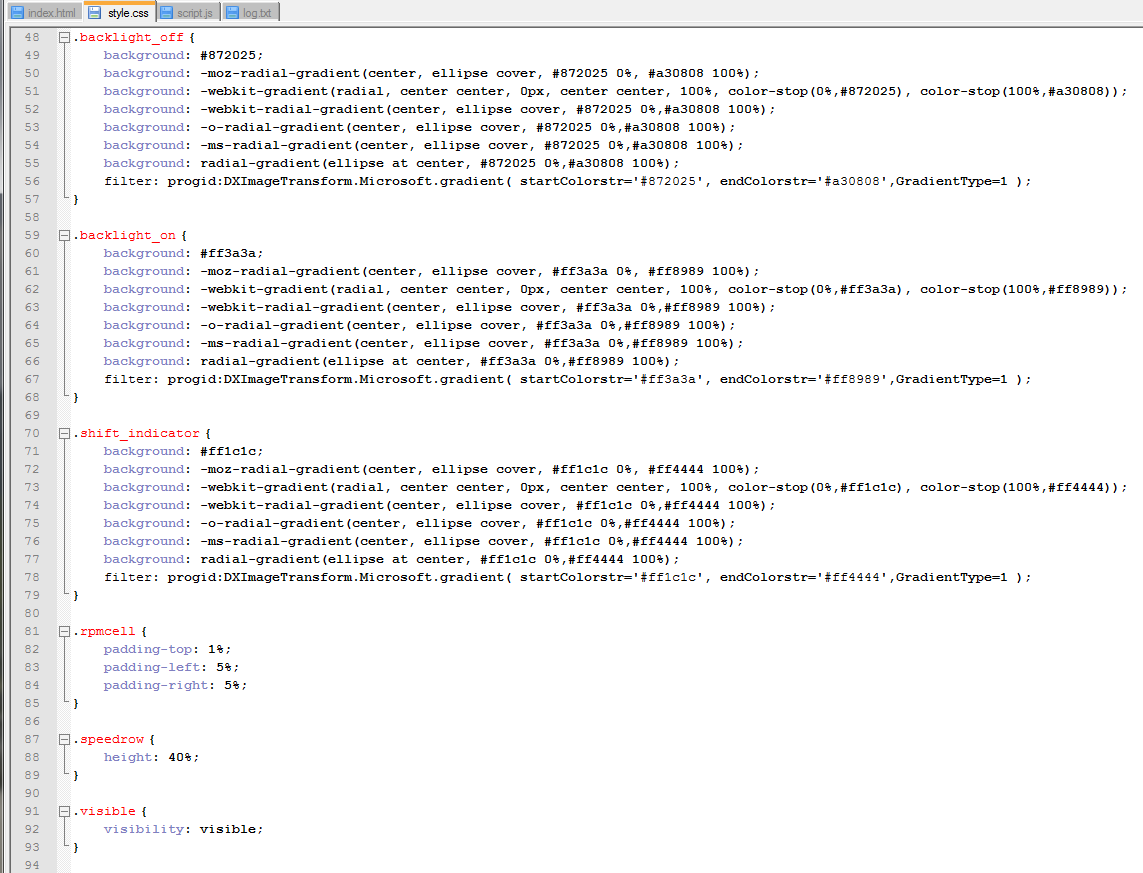
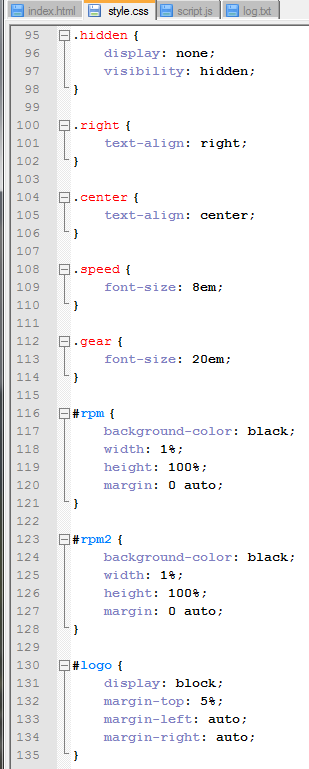

In figure 11, 12, 13 and 14 the content of the style.css is shown, where positions and design properties are set. For the generation of a gradient, such as the classes .backlight_on, .backlight_off and .shift_indicator, it makes sense to use a gradient generator like ColorZilla.


In figure 15 the declared data fields are shown. The two booleans backlight and lcd1 refer to the state of the buttons, the remaining data fields store the last and best lap time as a string and as a float, thus generating the corresponding string and add it to the DOM only is done if the value changed.
Figure 16 shows the implemented function updateType1(json), this function is called 8 times per second and converts the data in the DOM that are needed in real time. First, the data is read from the JSON object and then the value of the response for gear will be changed if it is 0 or -1 to N or R. Following to set the rpm value into relation to the maximum rpm value to get the current rpm percentage. If the current rpm percentage value is greater than 90% the shift indicator is set. After that the cells of the currently visible table (LCD mode) will be filled.
In figure 17 the function updateType2(json) is implemented, this function is called once per second, the updateType3(json) requires no functionality in the tutorial, the function will only be called when one of the static values changes (see compatibility matrix). In the updateType2 function, the output of the last and best lap time is treated including the difference. So a string of lap time (1:24.543) is only generated when the lap time (84.543) is different from the previous stored lap time. This is not mandatory, but it should give an idea how the dashboard can be optimized if performance issues occur.
In figure 18, the two functions are implemented which are called when the backlight or LCD mode button is clicked or tapped. These functions are quite trivial and change the current value of the corresponding data field and place the appropriate CSS class to the HTML element.